Running Zigbee2Tasmota on the ZigStar Olizig PoE
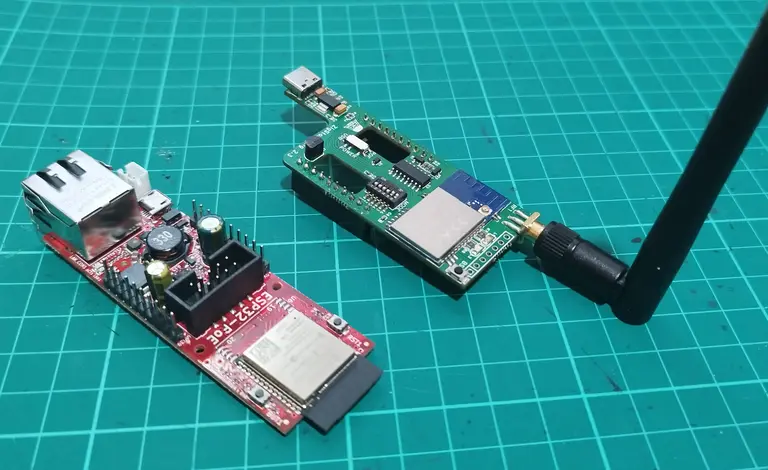 The two halves of the ZigStar OliZig POE
My zigbee-based IoT empire (mostly turning lights on and off) has historically involved a raspi running zigbee2mqtt, talking to the zigbee network via a CC2652R-based USB dongle called a zzh. Zigbee devices are presented on the mqtt message bus, and can thus be automated however one chooses.
Latterly the zzh has been repurposed as a bluetooth sniffer, so I needed a new TI chip to take over zigbee duties. Enter the OliZig POE. It’s built on an Olimex ESP32-POE, an ESP32 dev board with a PoE ethernet port. On top of this sits a daughter board which is basically the same thing as the zzh. The ESP32 presents the zigbee radio on a TCP socket, and zigbee2mqtt on the pi can connect to it over the LAN. This allows us to place the zigbee coordinator where it can get the best signal, while keeping the pi tucked out of the way.
It works great out of the box using the shipped firmware, with no need to change any settings or re-pair anything, two thumbs up. However we’re now in a situation where most of the work is still happening on the pi, and we’re using the powerful ESP32 SoC just to send the raw zigbee packets over the LAN to be processed by a bunch of javascript code in the form of zigbee2mqtt. Not very tidy. Surely the ESP32 could handle zigbee2mqtt’s job and process the packets locally? Enter tasmota.
Tasmota is a generic open source firmware for ESP chips, designed for building IoT devices. It has all the features we need: mqtt integration, predefined pin mappings for our olimex board, and a zigbee module that supports the exact same Z-stack firmware that’s already flashed to the CC2652P. It’s explicitly inspired by zigbee2mqtt, with zigbee messages being bridged to the mqtt broker in a similar way. Tasmota also provides lots of scripting, events and timer features that could probably even replace my automation scripts.
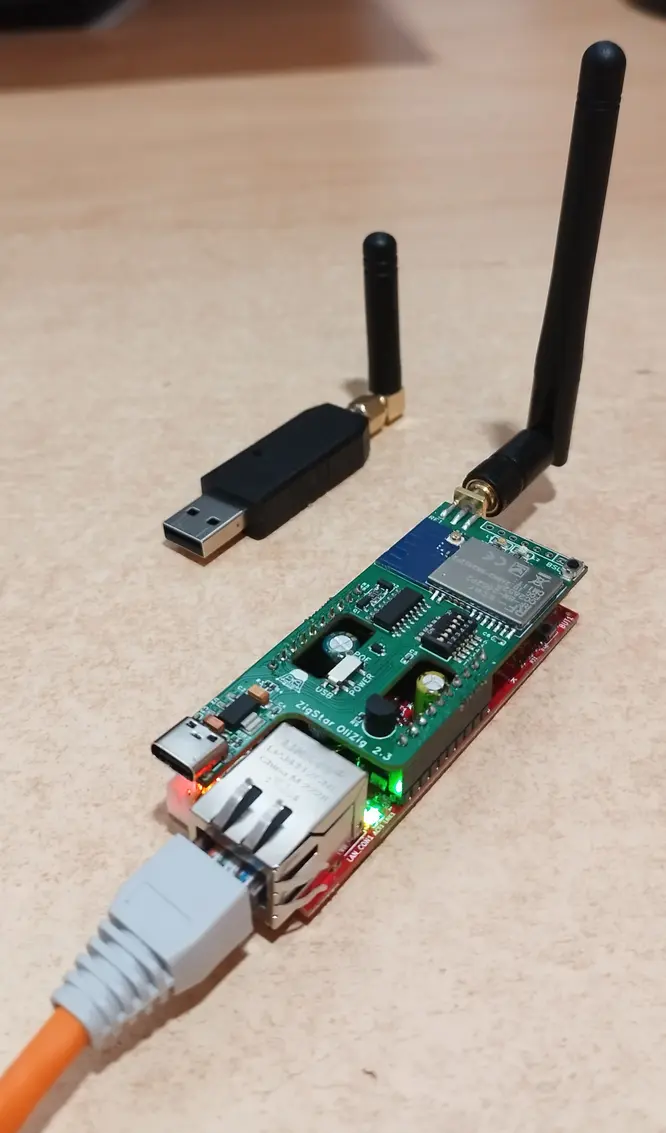 The complete OliZig board, with the zzh in the background
Setting up tasmota
None of the precompiled tasmota binaries contain the all the features we need, even the “unofficial” builds, so we’re going to have to compile it ourselves. For maximum laziness I recommend the tasmocompiler docker image, which provides a web GUI allowing you to pick the feature flags you want and have a firmware image returned with a single click.
Select the “Generic ESP32” board, and then add at least the Zigbee and Ethernet features. I decided to throw in bluetooth as well. The Custom Parameters section can be left as-is.
Flash the resulting firmware.bin to the chip using one of the many available methods. Note that while the olimex documentation warns you not to flash the chip with the PoE plugged in due to a lack of power supply isolation, conversely the tasmota docs warn you not to flash on USB power alone, as it’s insufficient. Personally I did both of these things multiple times and it was all fine. Try not to fry your board.
Once you’re done head into the tasmota Configuration menu in the web UI and click Configure Other. Paste the following into the Template field:
{"NAME":"ZigStar Olizig PoE","GPIO":[1,1,8864,1,3552,1,0,0,5536,1,8832,8800,5792,0,5600,1,1,1,1,5568,1,1,1,1,0,0,0,0,5793,1,32,1,3584,1,1,1],"FLAG":0,"BASE":1}
Make sure you check Activate before you hit save. Now all the GPIO pins are mapped correctly for the olizig board. This enables the zigbee and ethernet modules within tasmota, so after rebooting you should see zigbee options in the main menu, and ethernet connection data on the Information page under the wifi details. A visit to the Console should show everything being initialized.
Configuring zigbee
Before anything else, set the address of your mqtt broker on the Configure MQTT page. Here you can also change the base mqtt topic, I put mine as olizig. Next we want to set some options to make the mqtt message structure a bit more user friendly. Run the following in the tasmota console:
Backlog SetOption83 1; SetOption89 1; SetOption112 1
Back on the main menu, press Zigbee Permit Join and pair a zigbee device. You should see it appear in the tasmota UI. Wiggle the controls so it sends some messages and the values will show up there too. Now head into the Console again and let’s give the device a name:
ZbName 0x502,bedside_lamp
Now we’ll get zigbee messages on the mqtt bus under a topic with the name for easy scripting:
MQT: tele/olizig/bedside_lamp/SENSOR = {"ZbReceived":{"bedside_lamp":{"Device":"0x502","Name":"bedside_lamp","Dimmer":94,"Endpoint":1,"LinkQuality":131}}}
To control zigbee devices from mqtt, we can send messages like so:
mosquitto_pub -h $MQTT_IP -t cmnd/olizig/ZbSend -m '{"Device":"bedside_lamp","Send":{"Power":false}}'
Note that while the SetOption calls give us incoming zigbee messages on per-device topics, there is no converse solution for outgoing messages. All zigbee commands have to be sent to cmnd/olizig/ZbSend, with the device name in the message.
 A screenshot of the tasmota zigbee UI that I had to steal from a forum because I forgot to take one of my own
Limitations
While we’ve got a comparable configuration to zigbee2mqtt with zigbee messages being bridged sensibly, there are problems in practice. When I paired my TuYa switches I found that they kept turning themselves off after 30 seconds or so. This is apparently a known problem with those devices, possibly with multiple causes, and the only certainty is that they work fine under zigbee2mqtt.
This is where we see all the work put in by Koenkk and the z2m community paying dividends and giving that project an advantage that’s difficult to beat: zigbee devices in the wild form an unruly ecosystem with different vendors coupling their devices’ behavior to their own hub implementations. The extremely active zigbee-herdsman-converters package that zigbee2mqtt uses to standardize them all into a consistent mqtt API represents a huge collective time investment that you’re not going to be able to replicate on your own.
While tasmota does provide a similar feature in the form of dynamic Zigbee plugin definition files, you have to write them yourself and the format isn’t well documented. Alas this is more time than I’m willing to spend. The core zigbee functionality works well, and would be fine if you were working with a specific project rather than a constantly shifting collection of shenzhen miscellany, but I decided to go back to zigbee2mqtt on the pi with the radio forwarded over the LAN.
Back to a serial gateway
Fortunately we don’t have to revert to the stock olizig esp32 firmware - tasmota provides its own serial to TCP functionality. You’ll need to compile a new build to get it, and as its not provided in the list in tasmocompiler you’ll need to paste the definition into the Custom Parameters:
#ifndef USE_TCP_BRIDGE
#define USE_TCP_BRIDGE
#endif
Feel free to include both this and the zigbee feature - they compete over the same GPIO pins so you can’t activate both of them at the same time. Flash the new image and reboot, and and make the following changes on Configure Template:
GPIO4 => TCP Tx
GPIO16 => None
GPIO32 => None
GPIO36 => TCP Rx
Alternatively paste this template on Configure Other:
{"NAME":"ZigStar Olizig PoE","GPIO":[1,1,8864,1,5472,1,0,0,5536,1,8832,8800,0,0,5600,1,1,1,1,5568,1,1,1,1,0,0,0,0,0,1,32,1,5504,1,1,1],"FLAG":0,"BASE":1}
Now head back to the console and set the serial bridge to start on boot:
Rule1 ON System#Boot do TCPStart 6638 endon
and then enable that with:
Rule1 1
Finally restart tasmota once more, and the zigbee radio is ready to be used with zigbee2mqtt again, on port 6638. Note that you should point it at the ethernet address of the esp32, not the wifi one! Bridging serial over wifi is known to be unreliable.
At this point z2m failed to start for me, with the message network with the same panId or extendedPanId already exists nearby. I had to remove the coordinator_backup.json file and then re-pair all my devices. Hopefully this doesn’t happen to you if you have a lot of them! It might help to turn them all off before you attempt to bring zigbee2mqtt back up, including the zigstar itself for good measure, as the ESP32 isn’t responsible for rebooting the TI chip anymore.
Happy automating!