Netmaker/Wireguard for the home LAN part 2 - Home LAN Gateway
 rijksmuseum via lookandlearn.com
This is part 2 of the “Netmaker for the home LAN” article, and in it I’ll go over instructions for setting up a home LAN gateway using netmaker and wireguard.
This will consist of a single node running on our LAN server which is also running the netmaker instance we set up in part 1. I’ll also describe the process of connecting “external clients” to the network, phones, laptops etc. This is netmaker’s term for wireguard clients that aren’t directly managed by netmaker.
Setup Instructions
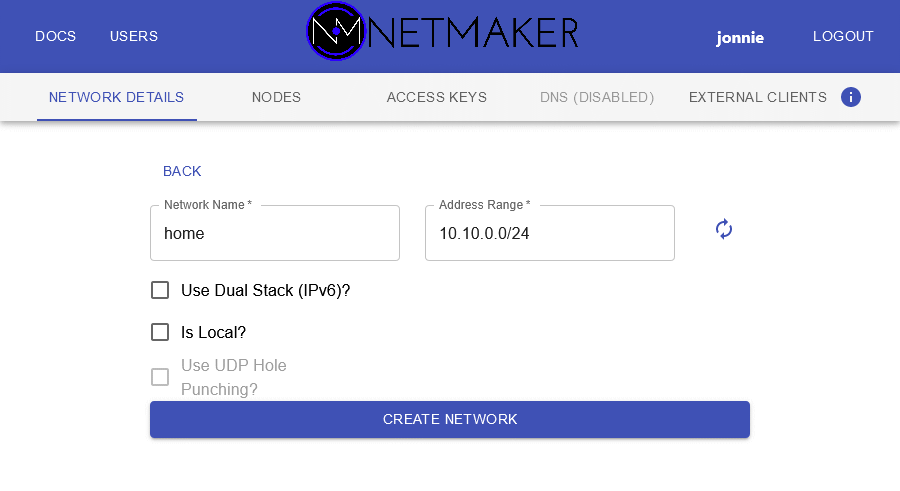
- First we’ll create the Home network that provides a gateway to the home LAN.
- Open the netmaker web UI. Click “Create Network” on the left. Fill in the name and a private subnet mask of your choice.
- Now we need to add the netclient instance running in the docker-compose stack on this machine to the network. Create yourself an access key for the Home network, and copy the “Access Token” to an editor window somewhere.
-
Open another shell in the directory with your compose file, and run the following command, with the access token you copied earlier in place of the
$ACCESS_TOKENvariable (or just define it):sudo docker-compose exec netclient /etc/netclient/netclient join -t $ACCESS_TOKEN -daemon off -dnson no - You should see some output like so:
2021/11/08 15:30:34 [netclient] joining home at <EXTERNAL_DOMAIN>:4444
2021/11/08 15:30:36 [netclient] node created on remote server...updating configs
2021/11/08 15:30:37 [netclient] retrieving peers
2021/11/08 15:30:37 [netclient] starting wireguard
2021/11/08 15:30:37 [netclient] joined home
- Over in the logscroll for the compose stack you should see the netclient daemon pick up on its new configuration:
netclient      | 2021/11/08 15:30:37 [netclient] no peers pulled
netclient      | 2021/11/08 15:30:37 [netclient] local Address has changed from  to <INTERNAL_IP>
netclient      | 2021/11/08 15:30:37 [netclient] updating address
netclient      | 2021/11/08 15:30:37 [netclient] checked in successfully for home
-
Back in the web GUI, you should see the new node in the nodes list for the Home network, in a
HEALTHYstate: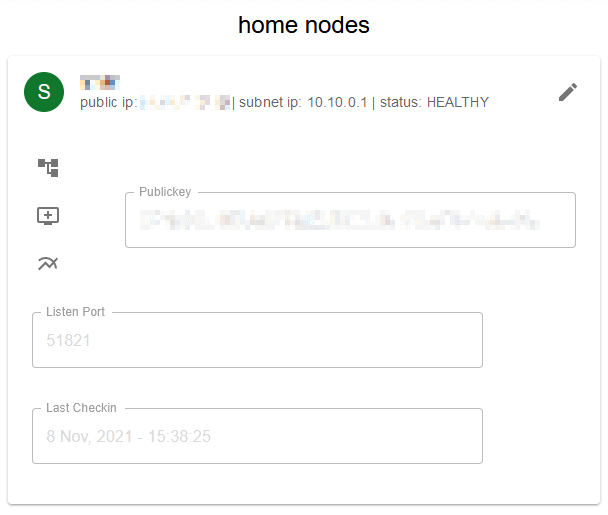
-
Now we’re going to set this node up to act as a gateway into our home network. It’s best do do this before adding other nodes so that the correct configuration is ready to be pushed to them when they’re joined.
Click this icon in the node list:

-
Fill in your LAN’s subnet and the name of the interface to which it’s connected on this machine, and hit Make Gateway:

Now this machine is configured to route traffic from the
homewireguard network out into the LAN. To complete the setup we need to make it an ingress node as well, to allow external wireguard clients.Click this icon in the node list:
 and confirm the dialog.
You may start seeing the following in the compose logscroll, don’t worry, this will disappear when some clients are added:
netclient      | 2021/11/08 16:26:53 Error retrieving peers
netclient      | 2021/11/08 16:26:53 rpc error: code = Unknown desc = could not find any records
netclient      | 2021/11/08 16:26:53 ERROR RETRIEVING EXTERNAL PEERS rpc error: code = Unknown desc = could not find any records
-
Click on External Clients in the web GUI menu, then click the plus icon in the list on the left to add a new client to the home network. Click it’s name on the list in the right hand column, and click the pencil icon to rename the client. NOTE: client names must be unique, across networks! I like to assign it a name including the network name, for example
sarah-phone-home. -
Now you can scan the QR code in the wireguard app on your phone, or you can download the config file to import into the desktop client on your laptop or another device.
-
Connect to this tunnel in the wireguard app, and you can now access your home LAN subnet from outside! A good way to verify this is to turn off your phone’s wifi, and then use the web browser or perhaps VLC’s smb browser to access machines on your home network.
Netmaker have published a video walkthrough of this process on their youtube channel It’s for a much earlier version of netmaker but everything shown still applies.
This concludes part 2. See part 3 for similar instructions on implementing a “personal VPN tunnel” configuration.